Publish images to Azure Container Registry from Bitbucket Pipelines
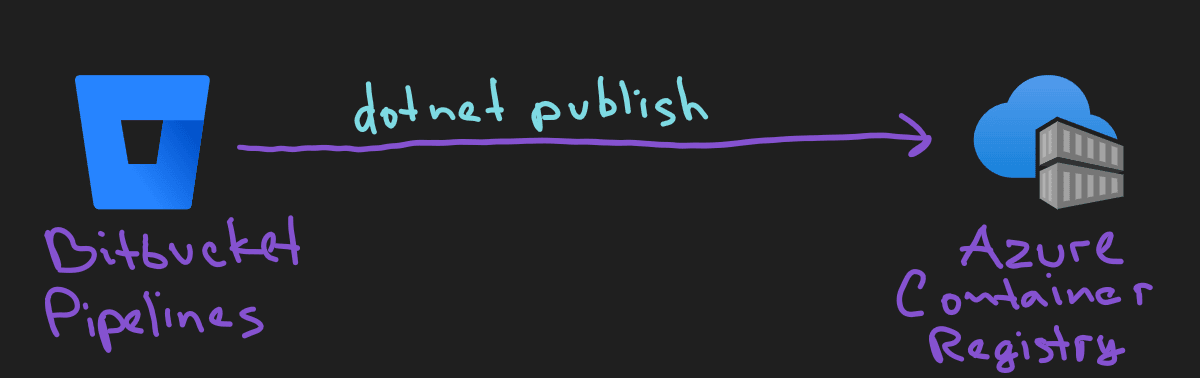
Today is part 3 of our miniseries on dotnet publish and Docker images. In the first one we reviewed how we can generate docker images locally, in the second one we pushed our image to Azure Container Registry with Service Principal authentication from our local environment, and today we will publish our image to Azure Container Registry from our CI build, namely Bitbucket Pipelines.
Prerequisites
I highly recommend going over the first and the second article in the series.
Let’s reiterate what we did:
- Configured our app’s image name (
<ContainerImageName>) and tag (<ContainerImageTag>) in.csproj. - Added
Microsoft.NET.Build.Containersnuget package. - Successfully pushed our image to the local docker daemon to validate our setup.
- Created a new Azure Container Registry.
- Created a Service Principal for the registry.
- Configured our app to use our Azure Container Registry (
<ContainerRegistry>) in.csproj. - Used
docker logincommand with Service Principal’s Id and Password to authenticate us locally. - Pushed an image to Azure Container Registry via
dotnet publishfrom the local environment to validate the established connection.
Just as a reference, this is how our .csproj looks like (notice <ContainerImageName>, <ContainerImageTag>, Microsoft.NET.Build.Containers and <ContainerRegistry>):
<Project Sdk="Microsoft.NET.Sdk.Web">

  <PropertyGroup>
    <TargetFramework>net7.0</TargetFramework>
    <Nullable>enable</Nullable>
    <ImplicitUsings>enable</ImplicitUsings>
    <ContainerImageName>hello-world-dotnet-publish</ContainerImageName>
    <ContainerImageTag>1.0.0</ContainerImageTag>
    <ContainerRegistry>dotnetpublishdemo.azurecr.io</ContainerRegistry>
  </PropertyGroup>

  <ItemGroup>
    <PackageReference Include="Microsoft.NET.Build.Containers" Version="7.0.306" />
  </ItemGroup>

</Project>
To push to Azure Container Registry from Bitbucket Pipelines via dotnet publish we need:
- Create repository variables for our Service Principal Id and Password. Service Principal info is sensitive and we do not want to keep it inside our repo or
bitbucket-pipelines.yml. - Create or edit a step that will a)
docker loginto authenticate, b)dotnet publishthe app. - Tag our image with the
$BITBUCKET_BUILD_NUMBERenv variable so that each build produces a unique tag and image.
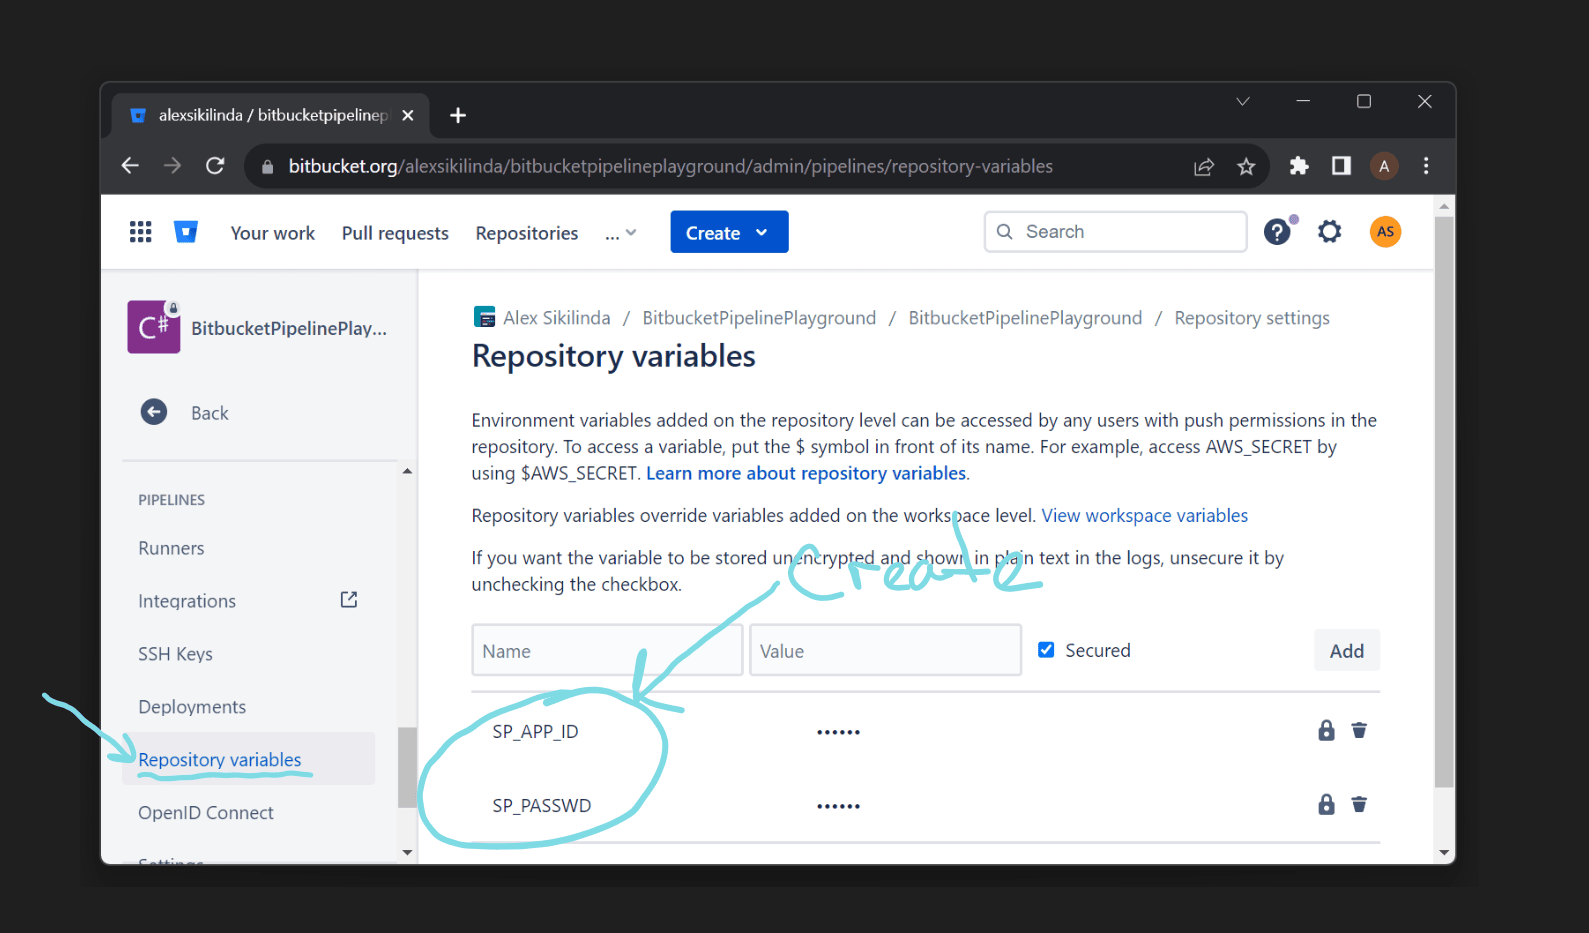
Create Repository Variables for Service Principal data
To authenticate with docker login we need our Service Principal Id, Password and the URL of our registry.
We want to create two new Repository Variables to store this sensitive info: SP_APP_ID for the Id and SP_PASSWD for the password. Let’s create them, go to Repository settings > Repository variables:
Create Bitbucket Pipelines step with dotnet publish
Now everything is ready to add the following step to bitbucket-pipelines.yml:
- step:
name: "Publish to Azure Container Registry"
services:
- docker
script:
- docker login dotnetpublishdemo.azurecr.io --username $SP_APP_ID --password $SP_PASSWD
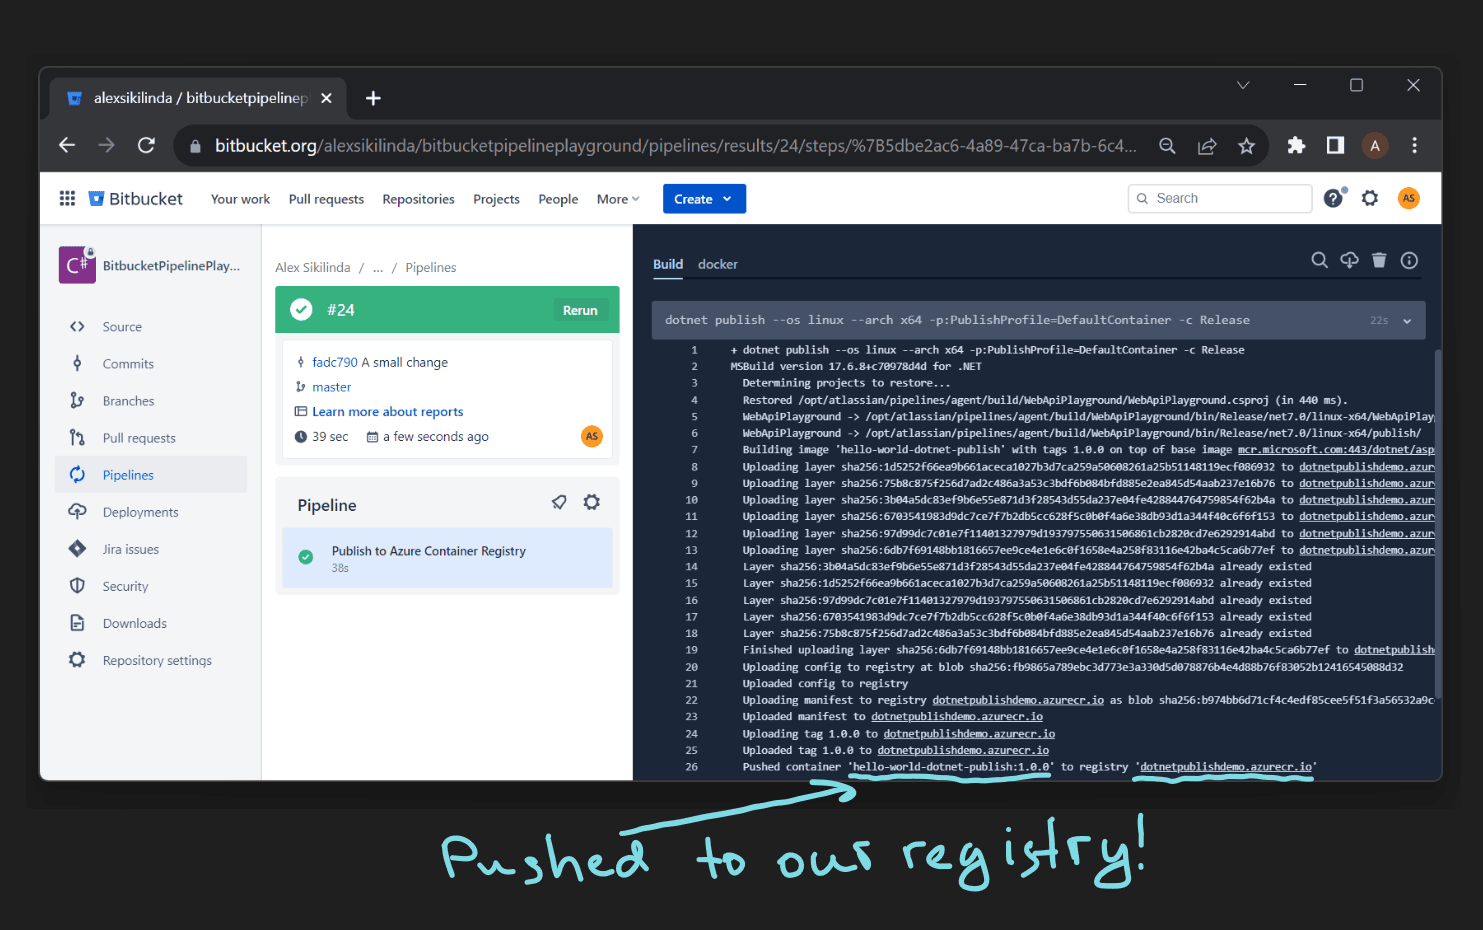
- dotnet publish --os linux --arch x64 -p:PublishProfile=DefaultContainer -c Release
Do not forget to replace dotnetpublishdemo.azurecr.io with your Azure Container Registry.
In this step we do exactly the same as we did locally: docker login to authenticate and dotnet publish to build and push the image. Since we are using docker login we need to add docker to the step’s services, otherwise, you will get an error:
bash: docker: command not found
If everything is setup correctly, we get a successful pipeline build:
Tag dotnet publish docker image with BITBUCKET_BUILD_NUMBER environment variable
Each time the pipeline runs, a new docker image is created. But because we have a static <ContainerImageTag>1.0.0</ContainerImageTag> tag inside .csproj file, all images have the same tag, thus the new one effectively rewrites the old image.
Even though it may be okay in some scenarios, ideally each build is producing an image with a unique tag. We can achieve it by using BITBUCKET_BUILD_NUMBER environment variable.
What is BITBUCKET_BUILD_NUMBER?
Pipelines provides a set of default variables that are available for builds, and can be used in scripts.
BITBUCKET_BUILD_NUMBERis used as the unique identifier for a build. It increments with each build and can be used to create unique artifact names.Variables and secrets, Bitbucket Docs
We can reference any variable’s value inside a pipeline by adding $ in front of it, so for BITBUCKET_BUILD_NUMBER it will be $BITBUCKET_BUILD_NUMBER. We already used this feature to reference $SP_APP_ID and $SP_PASSWD inside our step.
Use $BITBUCKET_BUILD_NUMBER inside .csproj
As you may remember, we set the tag in our .csproj file inside the <ContainerImageTag> element. This means we need to reference an environment variable inside our .csproj file which can be achieved with $() syntax.
Let’s modify <ContainerImageTag>1.0.0</ContainerImageTag> to <ContainerImageTag>1.0.$(BITBUCKET_BUILD_NUMBER)</ContainerImageTag>. This will force each tag to be unique since BITBUCKET_BUILD_NUMBER is unique for each pipeline build.
Using three numbers in a.b.c format for docker tags is called Semantic Versioning and is an established approach, so we will also utilize it. The c, or the patch, will be incremented automatically inside our pipeline, but we can also change major (a) and minor (b) versions manually inside our .csproj if needed.
Our final .csproj file looks like this:
<Project Sdk="Microsoft.NET.Sdk.Web">

  <PropertyGroup>
    <TargetFramework>net7.0</TargetFramework>
    <Nullable>enable</Nullable>
    <ImplicitUsings>enable</ImplicitUsings>
    <ContainerImageName>hello-world-dotnet-publish</ContainerImageName>
    <ContainerImageTag>1.0.$(BITBUCKET_BUILD_NUMBER)</ContainerImageTag>
    <ContainerRegistry>dotnetpublishdemo.azurecr.io</ContainerRegistry>
  </PropertyGroup>

  <ItemGroup>
    <PackageReference Include="Microsoft.NET.Build.Containers" Version="7.0.306" />
  </ItemGroup>

</Project>
And if you push this change, you will see new images appearing inside your Azure Container Registry each time the pipeline is triggered:

I’ll stop here, hopefully this dotnet publish miniseries is useful for you.
Summary
- Pushing Docker images to remote registries requires
docker loginanddotnet publishcommands. - The pipeline step needs to include
dockerservice, otherwisedocker loginwill not work. - Service Principal authentication is the recommended auth for “headless” scenarios, such as Bitbucket Pipeline build.
- Service Principal Id and Password should be stored as repository variables.
- Automatic Semantic Versioning can be achieved by using
BITBUCKET_BUILD_NUMBERvariable for docker images tags. We can reference this variable inside our.csprojfile using$(BITBUCKET_BUILD_NUMBER)syntax.